
Grow Loofahs This Spring!
Why grow loofahs?
We use loofahs as natural scouring pads for use in the kitchen and bathroom(s). We have found that on average – a loofah – to wash dishes by hand three-four times a day – will last 4-5 months.
It is very satisfying to grow your own loofahs – it is a positive step to towards living lightly on the earth, become less reliant on one particular commercial product and help save the planet by not buying single-use plastic, plastic sponges or microplastic pads. You also avoid buying products (such as coconut or loofah scourers) that come from abroad.
I’ve noticed that used loofahs don’t smell and they can be composted at the end of their lifetime .. unlike plastic-based sponges or scourers
Loofahs are easy to grow!
We have been growing loofahs for the past four years. The first year wasn’t very successful. From 10 seeds we only managed to grow 2 small loofahs but each year we persevered and kept sowing the seeds.
Subsequently, the plants have become more resilient as they have adapted to our climate here in South-east Herefordshire. Last year was a particularly successful yield because the summer was so warm!

What do you need to grow loofahs?
- Luffa Cylindrica seeds from a reliable source
- Greenhouse, conservatory or south facing room with plenty of sun and heat
- Compost
- Pots – small (and later large)
- Supports such as canes and wire
- Watering can to keep
Most sites that sell seeds explain you need a propagator. We haven’t. We sowed the seeds in smaller pots and kept them in the greenhouse. Then transplanted them to their bigger pots with canes to support the vines. As the vines grow, we erected wire in the greenhouse for the vines to grow along and support the heavy fruits.
Harvesting is fun!
Watch the basic technique on this you tube video (first 3minutes): https://www.youtube.com/watch?v=0H6iGIEgFjE.
The fibrous loofah is the inner part of the gourd (fruit) and you will recognise the time to harvest by eye and touch. The flesh starts to shrink and turn slightly yellow, and the gourd’s skin has more a ‘leathery’ feel. You peel back the green/yellow skin and expose the loofah. Then you will need to beat the loofah several times against something hard (but not rough). We beat the loofahs against an outside wooden table to remove the black seeds from the inside of the loofah. If you have young children or teenagers – they will love ‘whacking’ the loofah to get out the seeds!
Wash the loofah in plenty of water to get rid of the rest of the flesh and seeds. Put the loofahs in an airy and sunny spot to dry out.
Do save the seeds (of which there are many!). Rinse and dry the seeds thoroughly before storing in a paper bag or jar and keep in a cool dry place.
You can also promote a ‘living lightly lifestyle’ by sharing your seeds with neighbours, friends, family and donate to local seed swaps.
Top tips
- Don’t cut up the loofahs too small. We found keeping the integrity of the loofah is best by cutting it in half or thirds (of course this depends on the size of the loofah). This way, the loofah keeps its shape longer and it doesn’t disintegrate
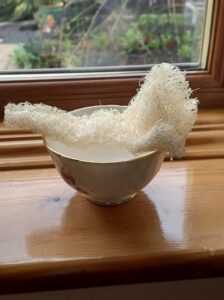
- Always keep the loofah dry after using. Rinse, squeeze out excess water and store where air can circulate around it. In the kitchen, I keep mine on top of a small ceramic bowl on the shelf in front of the kitchen sink. For the loofah I use for the bathroom(s) – I rinse and put on top of the radiator to dry. Then store in a dry dark place with my cleaning products
Link to read more: https://www.nationaltrust.org.uk/discover/gardening-tips/grow-your-own-loofah-kitchen-sponges