
Mana – Wall finishes
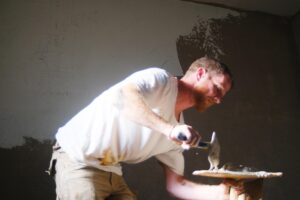
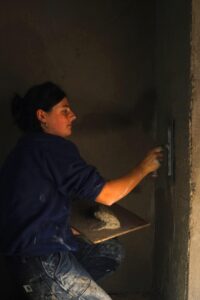
First 2 photos courtesy of Harry Gaved
With our walls being made from hempcrete which breathes, has thermal mass and regulates humidity, we wanted wall finishes which would compliment these features. Many modern builds including passiv houses use membranes to perform these functions but we decided for natural solutions by choosing for clay plaster on the inside and lime render on the outside.
Clay has thermal mass, is breathable and also absorbs smells, acting like a giant and filter. Unlike lime plaster it is very safe to use and does not cause skin irritation. The base coat plaster we are using is from Will Stanwix and it’s made from clay, sand, straw and in our case it arrived ready mixed with water in huge 1 ton bags. It loses no time in starting to ferment. Fermented clay plaster is a specialized type of clay plaster where the clay is fermented (or “soured”) before being mixed with other ingredients like sand, fibres, and sometimes natural additives. The fermentation process enhances its properties significantly. It breaks down the clay particles, making the mixture smoother, more pliable, and easier to apply. This reduces the effort needed during application and allows for finer finishes. Fermentation helps bind the clay particles more tightly, resulting in a stronger and more crack-resistant plaster once dry. The process can also improve adhesion to walls, reducing the likelihood of peeling or flaking over time. Fermented clay retains its natural ability to regulate moisture but with improved structural integrity, ensuring walls remain breathable without compromising durability. Fermented clay plasters shrink less during drying, minimizing the risk of cracks and the need for frequent repairs. The fermentation process can act as a natural preservative, extending the shelf life of the clay mixture and preventing mould or bacterial growth in the wet plaster.
The down side is that when it is wet the plaster smells like a cow shed!
We decided to work with the School of Natural Building (SNaB) which is based in Todmorden in Yorkshire to host 2 clay plastering courses. The first course concentrates on base coat which goes onto either the hempcrete outside walls or onto wood wool boards for inside walls. The SNaB facilitator was Simon Lovatt from Calch a Chlai based near Aberystwyth in Wales and he started the course by introducing the raw materials and what their purpose is.
Basically clay is the binder that holds the mix together, straw provides tensile strength and sand provides compressive strength. Tensile strength is important to stop the plaster cracking, compressive strength helps give the walls solidity to cope with things or people leaning into the wall and to cope with knocks. The recipe can be modified to give different characteristics by changing the proportions of each material We got to try 1 part clay with 1 part sand, 1 part clay with 2 or more parts sand, clay with varying amounts of straw, and all three materials in varying amounts. These were all applied to some wood wool boards so that we could see how thick and how easily they apply, and later we could see how well the dry. For example 1 part clay to one part sand cracked a lot whilst drying and just clay and straw dried very slowly.
So what is the ideal mix? “Well, it depends.” We heard this phrase a lot during the course! On straw bale houses for example more straw in the mix gives better bonding onto the straw bales. On hempcrete the best mix is proportions of 1:1:1. So “it depends” on what you are applying to, what is going on next and how much you want to spend. Clay is the expensive element whilst sand and straw are relatively cheap.

Then we got to find out how to mix the materials together. The elements are placed in large buckets and layered in equal quantities, then the water is added and mixed with a paddle mixer until it is the right consistency.

Our plaster arrived ready mixed in ton bags and just needed remixing with additional water to give the right consistency for applying This was done in a larger drum mixer so that we could mix a lot at a time. With 8 students on the course it got used up quite quickly.
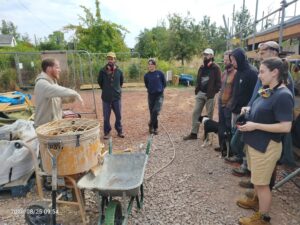
Applying the clay is surprisingly straight forward but does need a lot of practice. The clay does however stay soft and workable for along time and is very forgiving if rework is required, and it changes with time which enables us to work it to smooth finish very a period of many hours if not days. First it is trowelled on, working from a corner and setting out “the field”, which means the section of wall we’re working on, and doing the edge and detail work, like reveals, before laying plaster on all over the wall.
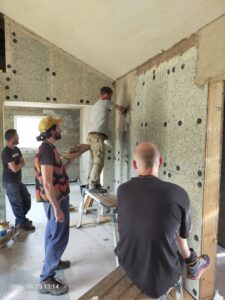
As the plaster dries is becomes more leathery and can be worked with a float to give a smoother finish. The different wall types required different treatments. Hempcrete walls are one continuous surface and it takes plaster really well with the plaster keying into the hempcrete. However the wood wool walls are a series of boards with gaps in between and these can be prone to cracking, so we applied a thinner layer of plaster and then laid jute mesh onto the surface and smoothing it into the plaster before applying a second layer of plaster on top. This adds an additional tensile strength to the plaster in much the same way as the straw does.
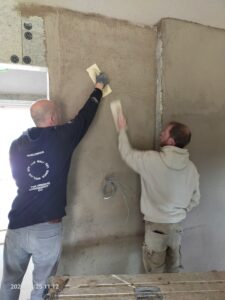
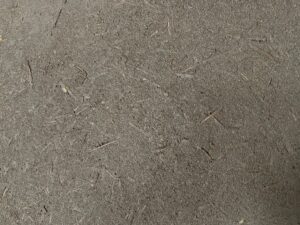
Reveals took a lot of time and were quite challenging because of multiple changes of direction and small surface areas which all needs to result in smooth, level surfaces and sharp corners. This process often took several days of working the profile and the work became different as the plaster continued to dry.
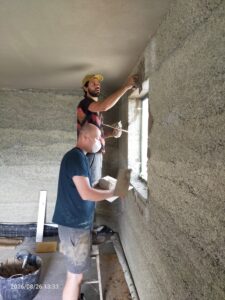
The top coat we chose is the colour of limestone and is made of bentonite clay, limestone power and white sand. It proved to be very different to apply compared to the base coat. It was runnier and, with the lack of straw it didn’t hold together the same way. Also the process of application was different. Basically the base coat has imperfections in the surface, although it is quite level on the wall, and the first top coat was applied very thin in order to just scrape plaster into the imperfection of the base coat. So now we understood why we were striving for a flat and uniform surface for the base coat. Again the field is set from the corner of the wall, material is applied and then scraped off across the surface and this needs to be completed for a whole wall in one go. The second layer is built up thicker to give the finish some strength and smoothed out using the trowel in much the same way as with the base coat. and finally another scrape layer is added before being sponged with a sponge float to bring the finer particles to the surface and provide the ultimate smooth surface.
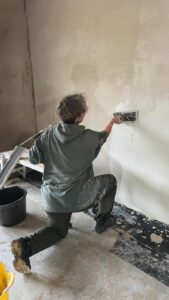
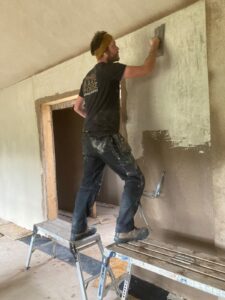
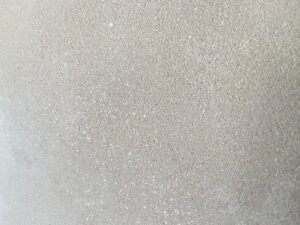
Top coat – limestone
The outside walls need to be weather resistant and durable and lime render fits this requirement, is also breathable allowing the whole wall to facilitate movement of both air and water into and out of the building which ensures that the inside atmosphere is safe and healthy.